Thanks to the trigger job threads here on CZ Forums, and the help of good members (eerw, double pedro amongst the many) I now have a pretty darn good trigger. One of the things that could've helped me in the past were some better diagrams of the sear and what was going on where. So, after working on a couple pistols and making good triggers, I documented what I did and decided to throw my own contribution in to help others.
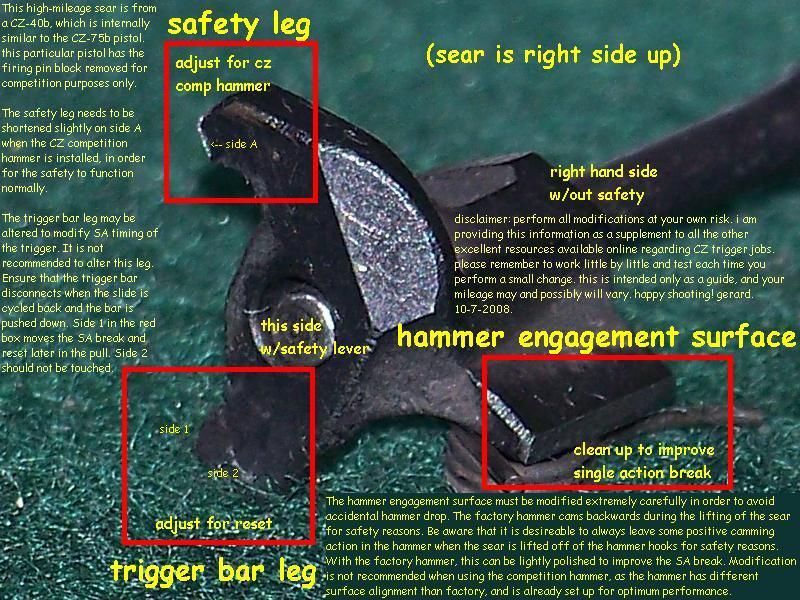
What you're looking at is the sear on my CZ-40b which I believe is approaching, or has just passed 17 thousand rounds... So yes, it's a little beat. But, I was able to outline and put some 'Cliff Notes' on the three key areas I worked on, with a front view and back view.
If you guys have any constructive suggestions, please let me know.
Thanks again!
updated 10-14-08: i updated the pictures to revise the information regarding the trigger bar leg. please delete older pictures if you have already downloaded them. thanks!
updated 02-09-09: after about 8,500 rounds, the bottom edge of my sear, when viewed through a magnifying glass, had rounded off ever so slightly to the point where one in five or so hammer drops resulted in the hammer falling past my cz competition hammer SA hooks. please note, my SA hooks are less than 0.5mm tall. the cz competition hammer is also hardened, while refacing the sear removes any hardening, if it was applied from the factory at all. after some research and thinking, i have decided to add this important note:
When refacing a factory CZ sear for use with either (a) the cz competition hammer, (b) a hammer with short SA hooks, be aware that thousands of rounds later, the hammer will wear away at the sear. Please take note to periodically check for any rounding or wear to the bottom of the sear face to ensure continued reliable operation.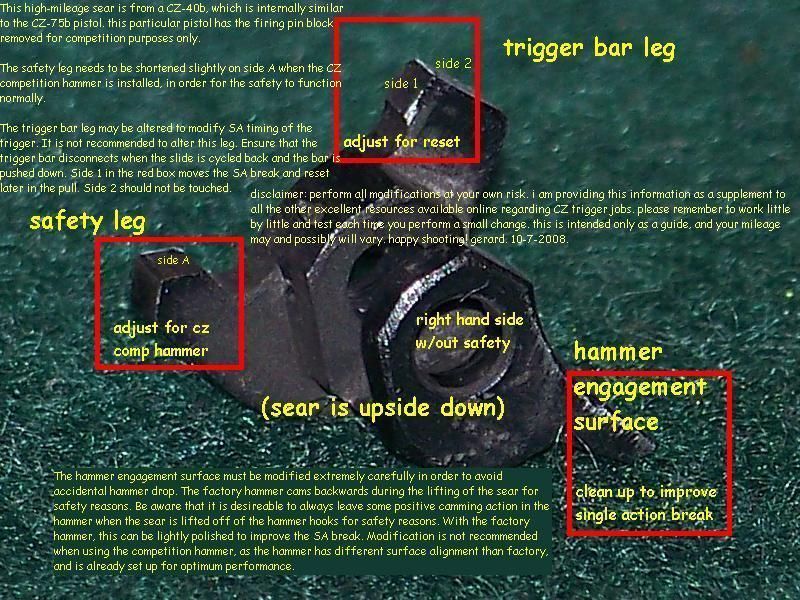
i repaired my sear face by refacing it in the meanwhile. before long, i will most likely have mine case hardened to deal with the hardened, short SA hooks on my cz competition hammer.
as always, any time you modify a sear, always go through the pre-flight safety checklist before running live ammunition through your pistol. a pre-flight safety checklist can be found by
clicking here.


